Introduction
What is hyperHTML?
hyperHTML is a DOM & ECMAScript standard compliant, zero-dependency, fully cross-platform library suitable for declarative and reactive Web Applications.
There is nothing new to learn with hyperHTML other than standard JavaScript, HTML, or CSS.
Its core features are built on top of template literals, where every interpolation is addressed once, as a unique DOM operation, and updated at lightning-speed when needed. Check out the most basic hyperHTML example below, where only the date related content node will change each second.
              function tick(render) {
                // implicit invoke through template literals
                render`
                  <div>
                    <h1 id=${page.id}>Hello, world!</h1>
                    <!-- dynamic content defined via interpolations -->
                    <h2>It is ${new Date().toLocaleTimeString()}.</h2>
                  </div>
                `;
              }

              // update the time each second
              setInterval(tick, 1000,
                hyperHTML.bind(document.body)
              );
Under the hood
Template literals aren't just better strings, they have hidden powers not every developer is aware of.
If you have a generic function and place it in front of a template literal without invoking it, the function will be executed receiving an Array as its first argument which will contain the list of chunks between interpolations, the rest of the arguments will contain the interpolated values.
              function template(chunks, ...interpolations) {
                console.log(chunks);          // ['1 ', ' 3']
                console.log(interpolations);  // [2] or [4]
              }

              // look, no parentheses
              template`1 ${2} 3`;
              template`1 ${4} 3`;
Not only is the function invoked, its first parameter will be a frozen, unique, Array. In this way, even if a template generates different strings due to changed interpolated values, its chunks will always be the same.
                const invokes = [];
                function template(chunks, ...interpolations) {
                  invokes.push(chunks);
                  return chunks.join(interpolations[0]);
                }

                // create two different strings
                const foo = x => template`1 ${x} 3`;
                foo(2);
                foo(4);

                // verify chunks were exactly the same
                console.assert(
                  invokes[0] === invokes[1],
                  'same unique Array'
                );

                // try a different template literal
                template`${2} 3`; //2 3

                // verify it's different
                console.assert(
                  invokes[1] !== invokes[2],
                  'different template used'
                );
This native feature, even reflected when transpiled via Babel, is key to generating a DOM structure and parsing it once, creating a unique relationship between a template literal and a DOM template.
What hyperHTML adds on top of this feature is a context to operate in, like a context you could use for any generic function or method call.
              // bind hyperHTML to a generic DOM container
              const bodyRender = hyperHTML.bind(document.body);

              // use it to declare any layout you needed
              bodyRender`
                <h1>${document.title}</h1>
                <ul>
                  ${[
                    {name: 'First item'},
                    {name: 'Second item'},
                    {name: 'Third item'}
                  ].map(item =>
                  `<li>${item.name}</li>`)}
                </ul>
              `;
View the example above on Code Pen.
Strawberry on top, hyperHTML uses the Levenshtein distance algorithm to update internal list of items or node, resulting in the least amount of needed DOM operation to make a list of nodes become another list.
Performance
It doesn't matter if it's a DBMonster, a thousand SVGs, a TodoMVC challenge, or a Hacker News PWA, hyperHTML gives you performance by default thanks to these simple facts:
- it's really lightweight, weighing around 4.5KB via brotli. That's all the bandwidth budget you and your users need.
- it doesn't double RAM or CPU usage via Virtual DOM operations, it doesn't use a Virtual DOM at all!
- it's fully based on ECMAScript standard and DOM specifications
The last point means that it's hard to perform much faster than hyperHTML in a similar minimalistic, elegant, yet powerful and expressive way, every other framework will inevitably end up manipulating the DOM.
hyperHTML just sits already there with direct access to every node or attribute change.
Read the essentials to learn how to start using it.
Essentials
Installing
You can include hyperHTML at the top of your page, using unpkg CDN.
<script src="https://unpkg.com/hyperhtml@latest/min.js"></script>
Alternatively, you can install the npm CJS package and require it later on.
npm i --save hyperhtml
If you use Babel to transpile template literals, your browser should be compatible with the following ES5 methods:
- Object.defineProperty
- Object.defineProperties
If you need a polyfill for the methods above you can use polyfill.io or ES5 shims and shams.
hyper(HTML)
The default hyper exported function, can be used
to create DOM nodes at runtime, populate existent nodes,
or weakly relate objects with nodes.
All these operations are available, as shortcut, through the following usage:
hyper`<p>runtime</p>`to create new DOM content each time
(shortcut for.wire()`...`)hyper(node)`<p>internal content</p>`to populatenodeonce with smart DOM content
(shortcut for.bind(node)`...`)hyper(obj, id)`<li>wired content</li>`to create new DOM content
(shortcut for.wire(obj, id)`...`)
While using hyper`<p>runtime</p>` for one-off operations just works,
binding a DOM node to create its own content or weakly relating generic objects are the best way to recycle the DOM and obtain best performance.
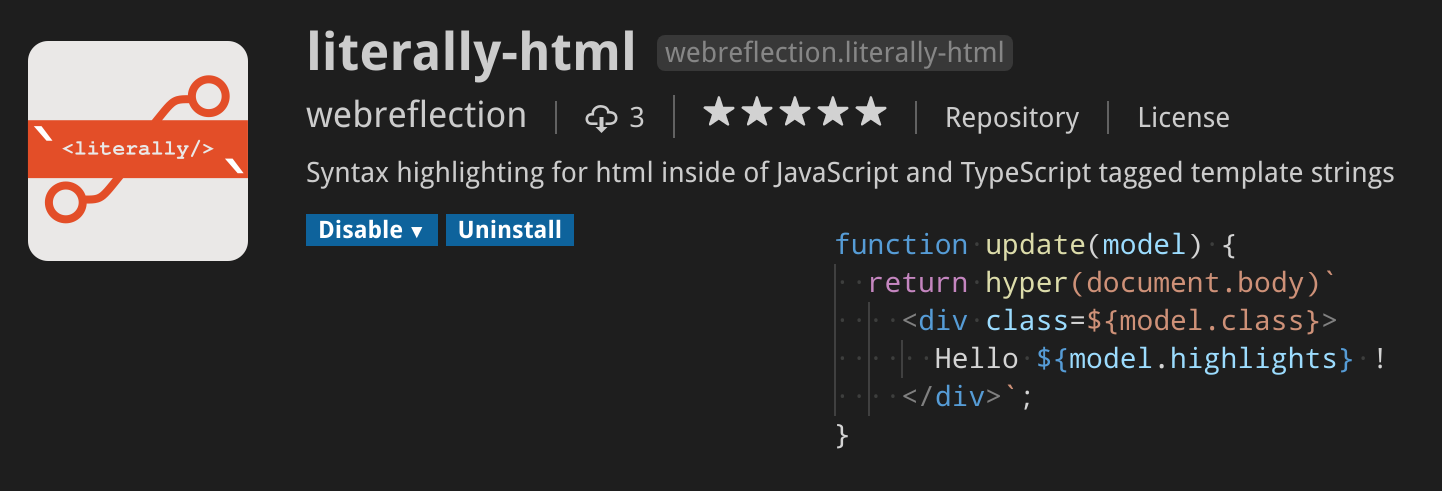
HTML Syntax Highlight
If you are using Visual Studio Core you can install literally-html.
Bind VS Wire
There are two basic mechanisms to create DOM nodes in hyperHTML:
- declaring the layout inside an existing DOM node,
like you would do on a
document.body, adocument.getElementById('node')target node, or a Custom Element node and eventually its Shadow DOM - declaring new DOM nodes and their content, like you would do for a list of table rows, LIs, paragraphs, articles, etcetera.
In the first case, you will need to bind the node as hyperHTML context. In the latter case, you would wire the declared content, optionally passing it an object.
              const {bind, wire} = hyperHTML;

              // find a container to render the layout
              bind(document.querySelector('ul'))`${
                // fill it up with wired items
                listOfItems.map(
                  // any object can be wired
                  // to a declarative content
                  item =>
                  // this will return, per each item
                  // an actual <LI> DOM node
                  wire(item)`<li>${item.name}</li>`
                )
              }`;
To render and update nodes multiple times, you need to bind them as context.
To create nodes on the fly, without rendering, you can use wires.
              const singleWire = hyperHTML.wire()`
                <li>node</l>`;

              const multiWire = hyperHTML.wire()`
                <li>a</l>
                <li>b</l>
                <li>c</l>`;
To properly render the wired variables, you will need a bound context to operate.
                hyperHTML.bind(document.body)`
                <ul>
                  ${singleWire}
                  ${multiWire}
                </ul>`;
Wire Types
When you bind a generic DOM node, it's easy for the library to understand what kind of node it is.
However, when you wire nodes at runtime,
it's important to distinguish between html nodes,
the assumed default, and svg nodes,
which require special treatment during their creation.
              const point = {x: 1, y: 2};
              hyperHTML.bind(document.body)`
              <svg>
                ${hyperHTML.wire(point, 'svg')`
                <rect x=${point.x} y=${point.y} />`}
              </svg>`;
By default, the html type is assumed,
but a non SVG element, even if appended inside another SVG element, won't produce the same result.
The wire type is there to solve this ambiguity, when needed,
as a runtime created node cannot know upfront its parent's node type.
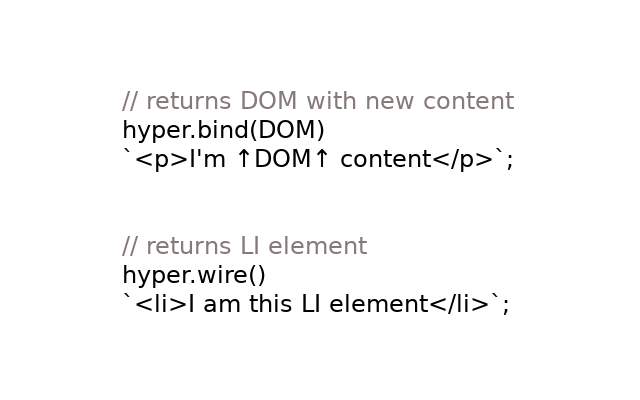
Wire IDs
A wire can be created without references
const newLI = hyperHTML.wire()`<li></li>`;
But it could also be created once, weakly relating its content to a generic object.
              const info = {some: 'data'};
              const sameLI = hyperHTML.wire(info)`
                              <li></li>`;

              // what if we use same template later on?
              console.assert(
                sameLI === hyperHTML.wire(info)`
                              <li></li>`,
                'same reference means exactly the same node'
              );
However, a single object could be the source of many pieces of layout.
Think about a generic user object.
It could be used to generate:
- a settings page
- an avatar
- a profile summary
- some contact details
In all these cases you want to create the layout once per user,
reusing as much as possible so that user has a weak reference to its layouts.
This is where specifying an id comes in handy, as it allows each user scenario to have multiple layouts associated with it.
              function createView(user) {
                const wire = hyperHTML.wire;
                const avatar = wire(user, ':avatar')`
                    <img width=80 src=${user.image}>`;
                return {
                  avatar: avatar,
                  profile: wire(user, ':profile')`
                    <h1>${user.name}</h1>
                    ${avatar}
                    <p>${user.phone}</p>`
                };
              }

              // show the user profile
              hyperHTML.bind(document.body)`
              ${createView(userObject).profile}`;
View the result on Code Pen.
IDs are also compatible with types.
For example, hyperHTML.wire(obj, 'svg:point')`<rect />` is perfectly valid.
Self Closing Tags
Directly borrowed from XML, or if you want JSX, both bound and wired content is capable of understanding self-closing tags.
              const p = hyperHTML.wire()`<p class="${any}" />`;
              hyperHTML.bind(p)`<i class=${fontIcon} />`;
Self closing tags are also particularly useful with <custom-elements/>
Attributes vs Content
By now it should be clear how to create nodes inside an existing element or on the fly. While this is great content-wise, we haven't talked much about attributes and what's possible with them.
Here's a list:
- every attribute can be defined with quotes or, if the whole attribute is a template literal hole, without quotes.
- attribute values can be one of 6 types:
- text, as string, for any kind of attribute
- boolean
trueorfalsefor special attributes suchdisabledand others - function or object for custom or native events, or to assign a
styleattribute - either null or undefined to explicitly clean or remove attributes of any kind, or to remove listeners
Every node can have one or more attributes defined in a similar way.
              hyperHTML.bind(form)`
              <input
                class=${['one', 'more', 'class'].join(' ')}
                disabled=${!isAuthorized}
                oninput=${e => document.title = e.target.value}
                value=${defaultInputValue}
                placeholder=${'type something'}
              >`;
Boolean Attributes
New in 2.34, there is a new specialized syntax to grant the desired behavior with boolean attributes.
              hyperHTML.bind(form)`
                <button ?disabled=${value}>
                  click me if you can
                </button>`;
This special syntax guarantees that the attribute will be either present, with an empty value, or removed, no matter if the value is a proper boolean or not: any truthy or falsy value will do.
Whenever an attribute has a special meaning, and it should be present or not, we can use boolean attribute values.
              // this will generate
              // <button disabled>click me if you can</button>
              hyperHTML.bind(form)`
              <button disabled=${true}>
                click me if you can
              </button>`;

              // this will generate
              // <button>click me if you can</button>
              hyperHTML.bind(form)`
              <button disabled=${false}>
                click me if you can
              </button>`;
The same concept works for defer, async, links download,
or even contenteditable. Just use boolean attributes any time you need them,
if it's part of the element's inheritance, it'll always do the right thing.
Events Attributes
The DOM Level 0 introduced inline HTML events a very long time ago.
These can be represented as strings in the layout within the element definition,
or as a direct property accessor like link.onclick = callback.
hyperHTML takes declarative events to the next level:
you can assign them as DOM Level 3 shortcuts for addEventListener or,
if the event is null, as a shortcut for removeEventListener.
This means that as long as an attribute name is prefixed with on,
every possible event can be assigned, either as a function,
or as an object,
through its handleEvent method.
              function click(e) {
                e.preventDefault();
                alert('You wish! Muahahaha');
              }
              const site = 'http://google.com';;
              const text = 'search something';
              hyperHTML.bind(document.body)`
              <a href=${site} onclick=${click}>${text}</a>`;
When it comes to creating DOM components,
having the handleEvent mechanism out of the box
is a very welcome, standard feature.
              function Login(user, pass) {
                this.validated = false;
                this._user = user;
                this._pass = pass;
                this.html = hyperHTML.wire(this);
                return this.render();
              }

              Login.prototype.handleEvent = function (e) {
                this[e.target.name] = e.target.value;
                this.validated = (
                  this.user === this._user &&
                  this.pass === this._pass
                );
                this.render();
              };

              Login.prototype.render = function () {
                return this.html`
                <form
                  method=post
                  action=/admin
                  onsubmit=${e => {
                    e.preventDefault();
                    alert('You made it!');
                  }}
                  >
                  <input name=user oninput=${this}><br>
                  <input name=pass oninput=${this} type=password><br>
                  <input
                    value='admin area'
                    type=submit
                    disabled=${!this.validated}>
                </form>`;
              };

              document.body.appendChild(
                new Login('super', 'secret')
              );
View the example above on Code Pen.
Bear in mind that runtime assigned listeners will inevitably remove and re-add themselves since two functions, even if identical, are always different in JavaScript. This means that while the previous example works fine for demo purposes, the onsubmit listener should be defined elsewhere and not inline.
Style Attributes
Fully inspired by Preact implementation,
style attributes can be updated via both strings, like any other regular attribute,
or via an object.
hyper(ref)`<p style=${{fontSize: 32}}>${'BIG CONTENT'}</p>`;
The data Attribute
Whenever you need to pass raw JS data down the element,
data=${anyObject} is the way to go.
The following code will log in console exactly the user reference.
No JSON is involved whatsoever in the process.
hyper(ref)`<p onconnected=${function () { console.log(this.data); }} data=${user} /p>`;
If you, however, find yourself restricted by data, big news for you: hyperHTML doesn't lock you in and it lets you free to implement it as follows for instance.
              customElements.define(
                'h-welcome',
                class HyperWelcome extends HTMLElement {
                  get html() { return this._html || (this._html = hyperHTML.bind(this)); }

                  get user() {
                    return this._user;
                  }

                  set user(value) {
                    this._user = value;
                    this.render();
                  }

                  render() {
                    return this.html`<h1>Hello, ${this._user.name}</h1>`;
                  }
                }
              );

              hyperHTML.bind(document.getElementById('root'))`
                <h-welcome user=${{ name: 'Sara' }} />
                <h-welcome user=${{ name: 'Cahal' }} />
                <h-welcome user=${{ name: 'Edite' }} />
              `;
View the example above on Code Pen
Partial Attributes (now supported)
Since version 2.30, partial attributes are supported out of the box.
However, before such version there was no support whatsoever, and following is why.
Differently from other libraries, partial attributes are not supported but there are many ways to achieve the same goal via a single definition.
Why no partial attributes?
Template literal interpolations can also contain other template literals.
Accordingly, there is no reason to compromise performance and over-complicate attributes logic.
As result, partial attributes were considered YAGNI
during the architecture design of the engine.
The following example shows several ways to update an attribute correctly as well as the wrong way, mentioned above.
              // THE FOLLOWING IS OK 👍
              html`<div class=${`foo ${mayBar ? 'bar' : ''}`}>Foo bar?</div>`;
              html`<div class=${'foo' + (mayBar ? ' bar' : '')}>Foo bar?</div>`;
              html`<div class=${['foo', mayBar ? 'bar' : ''].join(' ')}>Foo bar?</div>`;
              html`<div style=${`top:${top}; left:${left};`}>x</div>`;

              // THE FOLLOWING BREAKS ⚠️
              html`<div style="top:${top}; left:${left};">x</div>`;
It's also misleading to think that an attribute can be partially modified.
Whenever you change a single portion of an attribute,
the browser needs to figure out what to do with the change as a whole, so: no partial attributes.
Content Values
Content values also have their own rules and features.
-
if content is text, as string, or any other primitive such as number, or boolean, this will be injected as
textContenthence sanitized against XSS.
This makes hyperHTML safe by default, but it could be even safer ( keep reading ) -
if the content is a DOM Node, it will be simply appended in place.
This is necessary to make wires work within other templates but you can use this feature as you prefer. - if the content is a Promise, it will be assigned once resolved. The resulting value can be of any understood type in this list.
-
if the content is an Array, it's an explicit intent to perform one of the following operations:
- if it's an array of strings, they will be injected as explicit opt-in for HTML
- if it's an array of DOM Nodes, they will be appended in place, which plays well with multi node wires.
- if it's an array of Promises, they will be placed once all promises are resolved, with any returned value
-
if the content is an Object, it's an explicit intent to perform one of the following operations:
- if it has a text property, it will force whatever value as sanitized string, hence XSS free text content
- if it has a html property, it will force whatever value as string, injecting it as HTML
- if it has an any property, it will resolve whatever content it has, compatibly with all understood types
- if none of the following is true, hyperHTML will try to find out if it has the type defined in its registry.
In which case, it will pass along whatever value it is to the defined callback, and it will parse the resulting object against the types in this list.
- if content is either null, or undefined, that part of the content will be cleared
The following example shows possible opt-in/out intents.
              function html(render) {
                return render`
                  <!-- text by default for strings -->
                  <p>Hello ${'World'}</p>
                  <!-- text as explicit intent -->
                  <p>Hello ${{text: 'World'}}</p>
                  <select>
                    <!-- any by default for no-strings,
                         Arrays are opt-in for HTML -->
                    ${['a', 'b'].map(v => `<option value="${v}">${v}</option>`)}
                  </select>
                  <!-- html as explicit intent -->
                  <p>Hello ${{html: '<strong>World</strong>'}}</p>
                  <!-- any content as explicit intent -->
                  <p>Hello ${{any: fetch('thing').then(b => b.text())}}</p>
                  <!-- will be resolved as text so it'll be textContent -->
                `;
              }
To define an intent with its own transformer,
you can use the define method.
              // define an encode intent
              hyperHTML.define(
                'encoded',
                encodeURIComponent
              );

              // use it like any other intent
              const text = 'a + b';
              html`<p>encoded ${{text}} is ${{encoded: text}}</p>`;
              // <p>encoded a + b is a%20%2B%20b</p>
Asynchronous Values
Core compatibility with Promises means you can import layouts asynchronously and return them once resolved. This was key to making Viper News HNPWA, one of the fastest to bootstrap, despite being 100% SSR.
However, having promises means there's no way to show content while waiting for them to resolve.
To solve this issue, you can use an extra builtin transformer called placeholder which will
provide content before the promise resolves.
The Placeholder
Every intent can be set up asynchronously
by simply using the placeholder property.
This property can be any content type listed above, although it wouldn't make sense to have this property asynchronous too.
              // fetch the list and render it as HTML
              html`<ul>
                ${{
                  html: fetch('/grocery').then(b => b.text()),
                  placeholder: 'Loading list ...'
                }}
              </ul>`;

              // or wire some content
              html`<ul>
                ${{
                  any: fetch('/grocery.json')
                        .then(b => b.json())
                        .then(list => list.map(
                          item => hyperHTML.wire()
                          `<li data-id=${item.id}>${item.name}</li>`
                        )),
                  placeholder: spinner.cloneNode(true)
                }}
              </ul>`;
View a basic example of placeholder on
Code Pen.
API
Even though hyperHTML is a function, it should be used as a namespace.
Every method is detached from its context so that you can easily
destructure them.
              const {bind:hyper, wire} = hyperHTML;

              hyper(document.body)`
                ${wire()`<h1>Hello Content</h1>`}
              `;
hyperHTML.bind(DOMElement)
Used as Function.prototype.bind subset,
since you cannot bind extra arguments 'cause these are not handled by template literals,
bind(el) is the method to use when you want to populate an element with some content.
The element must exist already, and must be a valid HTML Element.
              const {bind, wire} = hyperHTML;
              bind(document.querySelector('main'))`
                <section id=${info.id}>
                  <h2>${info.title}</h2>
                  ${info.articles.map(article => wire(article)`
                    <article>${article.author}</article>`)}
                </section>`;
hyperHTML.wire([obj[, type:id]])
Whenever you want to create a container, instead of populating one,
or when you want to create some DOM content at runtime,
wire()`<p>hello</p>` is the way to go.
              const {wire} = hyperHTML;
              const name = 'World';

              // wire() to create an element
              document.body.appendChild(
                wire()`<h1>Hello <em>${name}</em>!</h1>`
              );
View the example above on Code Pen
If you'd like to use wire like a generic html content creator,
you can use a very simple utility like the following one:
              // a wire itself is just a function used with
              // template literals. You can pass values right away.
              const html = (...args) => hyperHTML.wire()(...args);

              document.body.appendChild(
                html`<p>this is so easy</p>`
              );
You can also create more than one element per wire. In these cases though, hyperHTML will produce an array, so that once appended as list of nodes, it won't lose references like a document fragment would.
Since by standard specification you cannot append an Array to a generic element, you need to bind the target container in order to make multi-wires work.
              const {bind, wire} = hyperHTML;
              const name = 'Andrea';
              const surname = 'Giammarchi';

              // multi-wire
              const myDetails = wire()`
                <p>${name}</p>
                <p>${surname}</p>`;

              // handled like a fragment
              // when passed to a bound element
              bind(document.body)`
              <div>
                ${myDetails}
              </div>`;
View the example above on Code Pen
Wiring an object
The strongest hyperHTML point is the ability to recycle and address every DOM node. However, when you wire elements at runtime, you are creating a fresh new element every time.
While in most cases this is not necessarily a performance issue, there is a larger amount of RAM and CPU operations needed that can be avoided.
The easiest way to do this, is by weakly relating a generic object to a generic wired content.
              const {bind:hyper, wire} = hyperHTML;

              const todo = [
                {id: 0, text: 'write documentation'},
                {id: 1, text: 'publish online'}
              ];

              // show the todo list
              update();

              // add an item in 2 seconds
              setTimeout(() => {
                todo.push({
                  id: 2, text: 'create Code Pen'
                });
                update();
              }, 2000);

              function update() {
                hyper(document.body)`
                <ul>
                  ${todo.map(item => wire(item)
                  `<li>${item.text}</li>`)}
                </ul>`;
              }
As you can see on Code Pen,
the second time the update() function is called
the only change that happens to the DOM
is that the new list item is appended to the end of the UL element.
This happens because elements wired to a generic object will not be created again, these will simply be exact same element and when it comes to list of same elements, hyperHTML does nothing but leaving these there.
Wiring SVGs
Beside relating wired content to objects, we might want to specify the kind of content we are going to create.
There are currently 2 types of elements accepted by hyperHTML:
- html elements, used as default
- svg elements, needing a special treatment
While hyperHTML can easily understand a bound element type, when you create a new element it's quite impossible to determine if you wanted the element as an SVG, a custom element or ... both ?
The optional second parameter for hyperHTML.wire() lets you explicitly define which type.
              // returns an SVG rect shape element
              hyperHTML.wire(null, 'svg')`<rect />`;

              // but by default, it would create just
              // an HTML rect element with no special meaning
              hyperHTML.wire()`<rect />`;
              // same as
              hyperHTML.wire(null)`<rect />`;
              // or as
              hyperHTML.wire(null, 'html')`<rect />`;
Multi wired objects
Now that we know how to relate some DOM content to a specific object, and how to define its type, we can move to the next step: using the same object to render multiple content.
To do this, all we need is an id, defined with a colon : prefix.
The reason for specifying it as colon and not # was to avoid confusion with DOM ids.
In this case we are referencing a generic name, or description, the template is used in relation to the generic object.
              const {bind:hyper, wire} = hyperHTML;

              const todo = [
                {id: 0, text: 'write documentation'},
                {id: 1, text: 'publish online'}
              ];

              update();

              function update() {
                hyper(document.body)`
                <style>
                .todo-id {
                  display: inline-block;
                  margin: 4px;
                  background-color: #eee;
                  padding: 4px;
                }
                </style>
                <p>
                  The list has the following IDs:
                  ${todo.map(item => wire(item, ':id')`
                  <span class=todo-id>${item.id}</span>`)}
                </p>
                <ul>
                  ${todo.map(item => wire(item, ':list')
                  `<li data-id=${item.id}>${item.text}</li>`)}
                </ul>`;
              }
You can verify on Code Pen
that calling update() multiple time will not trash the previous content,
and objects can be related multiple times with different wired content.
To specify a different kind of element and an id, you can simply write the kind upfront.
              // default as html
              hyperHTML.wire(obj, ':id');
              // same as
              hyperHTML.wire(obj, 'html:id');

              // but different from
              hyperHTML.wire(obj, 'svg:id');
hyperHTML.define(intent, callback)
You can extend hyperHTML intents by defining a name and a callback. This mechanism is basically the same used to explicitly opt-in for text, html, or any other accepted value, including attributes.
This callback will receive whatever interpolated value is passed along, and its returned value will be used as the transformation.
If the name contains one or more hyphens -,
the intent would be set for attributes instead,
and the callback will receive the node element,
and the interpolated value passed along.
Its optionally returned value will be used as attribute value.
This value can be anything, including an intent itself.
              hyperHTML.define(
                'adminArea',
                (credentials) => {
                  const form = new FormData();
                  form.append('user', credentials.user);
                  form.append('pass', credentials.pass);
                  return {
                    any: fetch('/auth', {
                          method: 'POST',
                          body: form
                        })
                        .then(b => b.json())
                        .then(ok => {
                          if (ok) return view.adminArea;
                          else return 'failed to authenticate';
                        }),
                    'placeholder': 'authorizing user ...'
                  };
                }
              );

              hyperHTML.define(
                'color-style',
                (node, value) => {
                  node.style.cssText = `color:${value};`;
                  return value;
                }
              );

              hyperHTML.bind(document.body)`
              <section color-style=${'red'} id="info">
                ${'Welcome'}
              </section>
              <section id="admin">
                ${{adminArea: {
                  user: 'andrea',
                  pass: '4ndr34'
                }}}
              </section>`;
Why is this needed?
Instead of polluting the local or global scope with extended behaviors, hyperHTML templates can always have extensions even when not defined.
This makes intents and templates completely independent from the surrounding scope, giving developers the ability to test them in isolation.
You could even mock intents, if it's testing you are after, and forget about real definitions and dependencies.
              const runtimeIntent = () => {};

              hyperHTML.bind(document.body)`
                <p>
                  This is fine.
                </p>
                <p>
                  ${{runtimeIntent}}
                </p>`;
Components
There are different ways to use hyperHTML as a component driven library and none of them are strictly better than another. To get the best compatibility without needing too much transpiling or polyfills, you can keep things simple by using hyperHTML to generate regular HTML. You can also go all-in with Custom Elements and optionally Shadow DOM, as a more modern and elegant solution, mostly suitable for modern targets.
Reactish Components
As shown in this example, it's possible to create components as functions or as classes.
              // as a function, same props, same node
              function Component(props) {
                return hyperHTML.wire(props)`
                <h1>Hello, ${props.name}</h1>`;
              }

              // as a class, each instance
              // same node returned via obj.render()
              class Component {
                constructor(props) {
                  this.props = props;
                  this.html = hyperHTML.wire(this);
                }
                render() {
                  return this.html`
                  <h1>Hello, ${this.props.name}</h1>`;
                }
              }
In these cases, there's no real need to create Custom Elements, and we could also style these components inline.
I know that many would think this is heresy, but the truth is that it just works.
              // as function, same props, same node
              function MyH1(props) {'use strict';
                return hyperHTML.wire(props)`
                <h1 style=${this.style}>
                  Hello, ${props.name}
                </h1>`;
              }

              MyH1.prototype.style = `
                background-color: black;
                color: white;
              `;

              document.body.appendChild(
                new MyH1({name: 'hyperHTML'})
              );
The example above, available on Code Pen,
abuses the usage of the inline style property,
making our components less flexible when it comes to themes.
Using just a semantic class attribute would probably be a wiser choice.
              function MyH1(props) {'use strict';
                return hyperHTML.wire(props)`
                <h1 class=${props.class || this.class}>
                  Hello, ${props.name}
                </h1>`;
              }

              MyH1.prototype.class = 'regular-h1';
In the example above it's possible to change all components by simply specifying
a different class value or passing one in case the related object
has a special meaning (i.e. it's an active H1).
Last, but not least, if you don't need inheritance,
you can just use regular functions without needing the new
operator in your code.
              function myH1(props) {
                return hyperHTML.wire(props)`
                <h1 class=my-h1>
                  Hello, ${props.name}
                </h1>`;
              }

              document.body.appendChild(
                myH1({name: 'hyperHTML'})
              );
Try the example above on Code Pen.
Polymerish Components
A modern approach to components is best represented by the Polymer project: it's based on modern Web platform standards, and it's the right tool for the problem it's trying to solve.
With hyperHTML you can also use Custom Elements right away, optionally including a proper polyfill upfront when needed.
              class MyComponent extends HTMLElement {
                static get observedAttributes() { return ['name']; }
                constructor(...args) {
                  super(...args);
                  this.html = hyperHTML.bind(this);
                }
                attributeChangedCallback() { this.render(); }
                connectedCallback() { this.render(); }
                render() {
                  return this.html`
                  <h1>Hello, ${this.getAttribute('name')}</h1>`;
                }
              }

              customElements.define('my-component', MyComponent);

              document.body.innerHTML =
                '<my-component name="First"></my-component>';

              const mc = new MyComponent;
              mc.setAttribute('name', 'Second');
              document.body.appendChild(mc);
Verify the result on Code Pen.
About Shadow DOM
There are no special rules to remember with Shadow DOM
because behind the scenes hyperHTML uses a template
element so if you bind a Shadow DOM element to hyperHTML, everything will just work.
In this Code Pen example, you can see that even the closed Shadow DOM is just fine as hyperHTML context.
              class MyComponent extends HTMLElement {
                ...
                constructor(...args) {
                  super(...args);
                  this.html = hyperHTML.bind(
                    this.attachShadow({mode: 'closed'})
                  );
                }
                ...
              }
Be sure your target browser supports Shadow DOM then go wild with Custom Elements and hyperHTML!
HyperHTMLElement Class
The goal of HyperHTMLElement
is to be an ideal companion to hyperHTML itself.
It removes all the repeated, boring and sometimes problematic setup steps needed
to define Custom Elements. This makes their creation a no-brainer.
Have a look at the comparisons VS Polymer.
Below are some HyperHTMLElement class features:
created()a reliable entry point to setup components, including injecting text content, html, or shadow dom- automatic
observedAttributesaccessors to react to when you change an attribute directly instead of passing through the verbose and boringcomp.setAttribute(name, value) - a lazy
htmlread-only property that will create content in the right place: the node itself or its shadow DOM, if previously defined. - automatic bound events without the usual binding overhead through native
handleEventbehavior, as described in this post, or through lazy method binding likehandleClickand others. - simple state handling through the
comp.setState(objOrFn)standard with automatic invocation of therender()method. - easy default state definition via
get defaultState() { return {}; }
Please note HyperHTMLElement exposes same hyperHTML methods.
There is no need to include both scripts in the same page.
<script src="//unpkg.com/hyperhtml@latest/min.js"></script>
At this point, you should be good to go and ready to create amazing PWAs!
About this.html
Lazily defined once per instance, this.html can be:
- the bound element itself, if no shadow dom has been attached once created
- the element
shadowRoot, if openly attached once created - the element
_shadowRoot, if the shadow has been created asthis._shadowRoot = this.attachShadow({mode:'closed'});
The latter attempt is the last resort to find an otherwise hard to reach, closed shadowRoot
but if you regularly use opened shadows, the shadowRoot node will be automatically available ( suggested ).
hyper.Component
If previous solutions didn't satisfy your requirements, version 1.6 introduced a minimalistic Component approach based on the following features:
- no custom elements needed. Forget polyfills and issues with classes extending built-in classes, it just works with regular HTML.
- automatic wire via lazy assignment. Just render returning
this.html`...`orthis.svg`...`without caring about hyperHTML at all. - basic state handling through a Preactish method such
setState(objOrCallback), including the ability to define adefaultStateaccessor. - simplified event handling directly borrowed by HyperHTMLElement behavior.
- onconnected and ondisconnected events out of the box
- Component.for(context, uid) utility to simplify creation of sub components within any render
- simplified dispatch to use the first available node and dispatch cancelable, bubbling, custom events with a
componentproperty and arbitrarydetaildata
The following examples represent hyper.Component features in a nutshell.
              class Clock extends hyper.Component {
                get defaultState() { return {date: new Date()}; }
                onconnected() {
                  console.log('finally live');
                }
                render() {
                  return this.html`
                    <div onconnected=${this} >
                      <h1>Hello, world!</h1>
                      <h2>It is ${
                        this.state.date.toLocaleTimeString()
                      }.</h2>
                    </div>`;
                }
              }
              class Counter extends hyper.Component {
                get defaultState() {
                  return {css: 'font-weight:bold;', count: 0};
                }
                constructor(count) {
                  super();
                  this.setState({count});
                }
                onclick() {
                  this.setState(prev => ({count: prev.count + 1}));
                }
                render() {
                  return this.html`
                    <button style=${this.state.css} onclick=${this}>
                      ${this.state.count}
                    </button>`;
                }
              }
Differently from most other frameworks, components don't really need a top level element.
              class ArrowPad extends hyper.Component {

                left() { this.setState({action: 'left'}); }
                up() { this.setState({action: 'up'}); }
                bottom() { this.setState({action: 'bottom'}); }
                right() { this.setState({action: 'right'}); }

                setState(state) {
                  super.setState(state);
                  this.dispatch('new-state', state);
                }

                render() { return this.html`
                  <button data-call=left onclick=${this}>◂</button>
                  <button data-call=up onclick=${this}>▴</button>
                  <button data-call=bottom onclick=${this}>▾</button>
                  <button data-call=right onclick=${this}>▸</button>
                  <p>Last action: ${this.state.action}</p>`;
                }
              }
The static Component.for(context[, uid]) utility helps solving tedious sub-components initialization.
              class List extends Component {
                constructor(items) {
                  super().items = items;
                }
                render() {
                  return this.html`
                  <ul>${this.items.map(
                    item => ListItem.for(item)
                  )}</ul>`;
                }
              }
Testing
hyperHTML is easy to test in the browser and in NodeJS. If you're testing in NodeJS you will, however, need a JavaScript implementation of the DOM (basicHTML or jsdom).
NodeJS
With NodeJS, if you're using basicHTML or jsdom you can use the same, familiar syntax you would when querying and interacting with the DOM in the browser.
The following is a basic NodeJS example test.
Browser
You can test right away with any testing framework you'd like, as you can see in the Browser example test.
Extras
This section is dedicated to F.A.Q. and other less important topics around hyperHTML.
Hyper Hyper Text ?
Few developers asked me about the apparently redundant name.
First of all, it's worth underlying that who used hyperHTML never cared or complained about its name.
They rather instantly appreciated the library innovative and revolutionary approach to solve a common problem
in such compact, elegant, standard, and also performant way: pick 4 of them.
For the little stats I have, it also looks like people complaining about the name are those that never used the library, but decided to already have an opinion about it.
Maybe they also need to find an(y) excuse to avoid trying such library, believing what they use daily is better and solved all their problems already.
Well, if that's the case, congratulations!
Regardless, maybe not everyone knows that hyper, which means too excited and energetic, and hypertext, which is a way of joining a word or image to another page, document, etc. on the internet or in another computer program so that you can move from one to the other easily, are two completely different words.
Java is not JavaScript, ham is not hamster, and you can have a steelyard made of steel too!
But even if you made up your mind before trying hyperHTML, and you think that having a more exciting way to declare Hypertext Markup Language doesn't make sense, I'd like to tell the story behind the name.
innerHTML vs hyperHTML
Binding HTML to a node context, looks very similar to the old way to inject HTML during 00's.
              // what the Web used to do
              // attributes and content are unsafe
              // XSS prone, and full of undesired surprises
              document.body.innerHTML = [
                '<div class="', className, '">',
                  textContent
                '</div>'
              ].join();

              // hyperHTML is safe by default
              // but it looks similar, if not easier
              hyperHTML.bind(document.body)`
              <div class=${className}>
                ${textContent}
              </div>`;
If reminding the good old days, emphasizing enhanced features, wasn't enough,
inner and hyper words also differs for just 3 chars.
Last, but not least, hyperHTML is part of a wider family, including viperHTML and basicHTML.
Accordingly, if you connect the word hyper with some Front End meaning, you'll never be confused by what project you need for what.
Is it Front-End? hyperHTML.
Back-End? viperHTML.
Do you need basic HTML on your project? basicHTML it is.
And so on ...
Still not convinced?
Imagine the bind operator will become popular and you will be able to write valid JavaScript syntax like:
              document.body::hyperHTML`
              <div>This is the content.</div>`;
Do you feel any better about the name now? 😃
If not, put in this way: if the name is the only complain you ever heard about a library, maybe it means it's that good, and you should really give it a try! 😜
hyperHTML vs lit-html
Since many have asked about the differences between these two libraries, I've written a gist full of explanations and examples.
Please note that lit-html is still experimental, while hyperHTML is ready for production so it's probably too early to fully compare both.